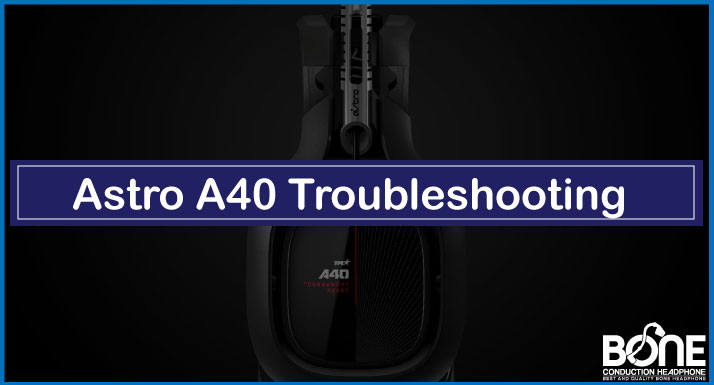
Suppose you are someone who just got into a gaming world with an enticing headset in your hands like an Astros A40 but doesn’t know how to hook it up with different kinds of devices. Or might be you aren’t tech-savvy and get jitters before doing any setups, or a live streamer needs to discover the dual PC settings. Whatever the case, this article has it all. It is here to provide you with a step-by-step guide to do your Astro A40 setups with your PC, MAC, Mixamp, Discord, or any type of console you like to play around with.
Let’s get you inside the detailed, easy-to-understand guide to perform your different Astro A40 setups;
Astro A40 PC Setup
For Astro A40 to connect with your PC. Here are some steps, you need to follow;
Solution
- Turn the switch to PC Mode, present at the back of the base station.
- Attach the base station through a USB Cable to the PC and power it up.
- Plug the microphone into its port and put the headphones in the base station.
- When the headset is charged up fully, the LED indicator will become orange. If not, re-insert the headset in the base station.
- The connection is established if the base station shows the charge status.
- The headset is fully charged when all of the battery status indicators (4) are illuminated.
Now, it’s time to do some configuration sound settings on the PC to have a profound experience of the sound; steps to follow are;
- Go to Start > Control Panel > Sound.
- Go to the Sound Menu > Playback Devices Tab.
- Select Astro A40 Game as Default Device by clicking right on the mouse.
- Choose Astro A40 Voice as a Default Communication Device by right-clicking your mouse.
- Tap the Recording Devices tab.
- Select Astro A40 Voice once again by right-clicking the mouse and choosing it as Default Communication Device.
And you are all set to go and have fun with your Astro A40 on your PC.
Astro A40 PC Setup Without Mixamp

In case, if you are wondering, is it possible to use your Astros without spending money on Mixamp and listen to the sound without dropping its quality? Then yes, it’s possible.
Here are some easy instructions to follow to connect your Astros directly to your PC without having a Mixamp included in the package.
Solution
- For connection, two distinctive cables are required i.e. the Inline Cable and a PC Splitter Cable
- Attach A 40, 2.0 m Inline Mute Cable, also known as Console Cable or Mute Cable to the headset (5 poles) and the other end plugged into PC Splitter Cable (4 poles).
- Make sure that all the PC configuration settings for the sound have been done for an uninterrupted experience.
Note: Peripherals such as a PC Splitter Cable with an Inline Mute Cable are required.
This would make it possible to avoid using a MixAmp by connecting the A40 Headset directly to a PC sound card.
Astro A40 PC Setup With Mixamp
Headsets used with Mixamp bring magic to the game or live streams. It gives the user the entire control of how they want to listen and balance the game sound to voice chat settings. so, below are some easy steps to set up your Astro A 40+Mixamp with a PC.

Solution
- First, ascertain that Mixamp has recent firmware installed and updated. You can do that by plugging the Mixamp into the PC by a USB port through a Command Center.
- Plug Mixamp with a PC through a USB cable, attach it to the USB port of the PC and insert an optical cable into the optical USB port if using any.
- Turn Mixamp into PC mode by holding the power toggle of Mixamp for 5 seconds until the power light glows from red to white.
- Then perform some settings on PC;
- Go to the task bar’s Speaker Icon > Playback Device.
- If you are operating with an Optical Cable > locate the Digital Optical Cable and set it as a default device.
- If using an optical output, navigate to digital optical output and set it as the default device. Right-click the mouse > Properties > Supported formats.
- Make sure that Dolby Digital Live is enabled and DTS is disabled if featured, and that the set sampling frequency at 48.0 kHz.
- If you are connecting it with a USB Cable and not the optical cable > navigate Mixamp and set this as a Default Device.
- Finally, connect your A40 headset to the Mixamp by Inline Mute Cable, one end into the headset and the other into the slot indicated as the headset icon in the Mixamp.
This way your Astro A40 Headset with a Mixamp is all set to go with your PC.
Check out our troubleshooting guide for Astro a40
Astro A40 Discord Setup On PC
Connecting your Astros gaming headset with Discord will give you the immense freedom to communicate in multiplayer games. But how will you set up your Astro A40 to the discord on your PC?, Follow the steps;
Solution
- Ensure that Astro command center and Discord chat settings are properly done for the best results with A40s.
- First, make sure that your A40 Astros and base station are connected properly.
- For the Discord > Settings > Voice and Video > Input device > should be selected as Headset Microphone A40 Voice.
- For Output device > should be set to Headset Earphones Astro A40 Voice. (It maintains the game voice balance)
- Now Discord should be able to recognize the Astro Headset.
For the audio optimization, the Astro Command Center;( make sure that Astro Command Center is installed.
- Go to Command Center > Microphone Settings Tab > Noise Gate Settings > Steaming / off.
- USB mic level > set at 100% within Astro Command Center
For the audio optimization, in Discord;
- under the drop-down menu, some sliders should be left at their full.
- For the Input Volume,> adjust it on the feedback of your game members.
- In the Input Mode > check on Voice Activity.
- For Input Sensitivity > Disable it for automatic determination of input sensitivity.
Astro A40 Setup On Mac
If you want to discover more about your Astros and want to find out how the headset can work with your Mac, There is an easy way to do it.
Solution
- Physically connecting a headset to a Mac is the same as to the PC mentioned above.
But For the setup of Astro A40 on mac; Follow the mentioned steps,
- Go to System Preferences > Sound Settings
- Tap the Output tab > select ASTRO A40 Game Option
- Select the Input tab > check the ASTRO A40 Voice Option.
Astro A40 PC Setup With Optical
Sometimes Astro users are confused about which port and cables should be used to connect the headset to the PC. We have it covered. This section shows you how to connect your PC to the headset with the use of an Optical Cable.
Solution
- Make sure the optical cable is inserted into the optical port of your PC.
- Disable any EQ software for your soundcard or onboard devices other than the ACC to avoid double processing.
- Ensure the Mixamp is set to PC Mode.
- Go for Sound Settings from the task bar’s speaker icon > Playback > set your Digital Output as a Default Device by right-clicking your mouse.
- Set Astro Mixamp Pro Voice as Default Communication Device.
- Disable Astro Mixamp Po Game as it has been replaced by a digital output.
- Go to Properties of digital output.
- Tap Supported Formats Tab > check the Dolby Digital Option for the format and select the Sample Rate of 44kHz or 48kHz which is supported by Astro A40.
- Go to Advanced Tab > select 48kHz and 24-bit.
- Click “OK”.
Warning: Do not select any other Sampling Rate, as the 48kHZ and 24-bit are the highest quality supported by Mixamp.
Astro A40 PC Setup Without Optical
Does your PC don’t have an optical port? No problem! It is possible to connect your PC with an Astro A40 headset wIthout using an optical cable in it. Follow these simple steps to do the setup.
Solution
- First, ensure your firmware is updated.
- Move the mode switch on Mixamp to PC Mode.
- Insert the micro end of micro USB Cable into the Mixamp and USB end into the PC.
- Plug the A40 Inline mute Cable into your headset’s port close to the mute switch.
- Attach the other end into the Mixamp port placed in front of the Mixamp..
- Go to Sound settings in your PC > Playback Device tab > in the Headphones Option, select Astro Mixamp Game > set as Default Device (by right clicking the mouse).
- Now in headset Earphone Option > select Astro Mixamp voice > set as Default Communication Device (by right clicking the mouse).
- Navigate to Recording Tab > in Headset Microphone > select Astro Mixamp Voice as a Default Device and Default Communication Device (by right clicking the mouse).
Note; the optical cables are particularly required for the consoles to attach with the headset but for the PC, the USB cable will be all what you need without having to spend on any sound card devices.
Astro A40 PC Setup Warzone
Do you want to dabble your hands into some Warzone gaming but don’t know where to start and how to do the settings for your Astros Headsets with it? Read the steps for guidance.
Solution
First, configure the in-game-audio settings;
- Go to Audio > Audio mix > Boost High/ Boost (in this you can hear the footsteps clearly)
- Set Master volume: 85%
- Music Volume: 0%
- Dialogue Volume: 100%
- Effects Volume: 100%
- Voice Chat: Enabled
- Open Mic Recording Threshold: 3.16
- Voice Chat Volume: 150.00
- Microphone Volume: 120.00
- Voice Chat Effect: No Effect
You can set the rest of the volumes as per standards or according to your preferences, nothing so technical about it.
Now, configure the Astro Command Center Audio settings;
- Set it to the Balanced Category > first row: set to 1, second row: -5, and the other rows are set to 4, 3, and 5 respectively.
- After wrapping up the settings, click Sync it to the device.
This is it for the sound settings. This will enable you to listen for those crucial sound points, crystal clear that will make you win the game of Warzone.
Astro A40 PC Setup Windows
The physical connections of PC to Astros would be the same defined in the first section of this article. Here are the steps to setup;
Solution
- On Windows > go to the Control Panel > Sound (incase of Windows 10 > Settings > System > Sound > Related Settings (through the right) > Sound Control Panel
- Go to the Playback tab.
- Select Optical port > set it as Default Device.
- Astro A40 Voice (USB) > set it as Default Communication Device.
- Navigate to the Recording tab > Astro Astro A40 Voice = both.
Astro A40 Dual PC Setup

If you wish to be a live streamer who wants to showcase his gaming abilities to the world but gets stuck around how to do a dual pc setting with your Astro A40 headset! this section is for you. Perform these instructions to get your dual pc setup done within minutes.
Solution
- First, let’s physically connect everything.
- Plug the HDMI of gaming PC’s into some external capture card port (such as Elgato HD60 S).
- Now insert a USB-C from the streaming PC into the external capture card.
- Plug the Mixamp power cord from the gaming PC into the Mixamp then goes straight to the headset.
In the gaming PC
- Download the respective external capture card’s software. In this case, it is Elgato gaming software. as well as the sound capture.
- After this, go to PC Gaming > select Astro Mixamp In where you want to hear your gameplay option.
- Choose an Output >Choose Elgato HD 60 S.
- Navigate to Advanced Settings > make sure both the Default Device for Playback and Default Communication Device for Playback is checked.
- Select Audio Input > None
- Make sure the rest of the below settings are turned off/ muted.
- Next, go to Sounds on the taskbar > Recording Tab > select Headset Microphone to Mixamp > go to Properties by right-clicking it > Listen Tab > check Listen to this Device Option.
- Select HD60 S in Playback through this Device Option.
In the Streaming PC
- Look at the bottom right of your streaming PC, you can see the headset’s mic is picking up the audio as its soundbar flicks while you speak.
Through these settings, you can easily enjoy live streaming and gaming simultaneously without worrying about anything else.
Astro A40 Setup On Xbox One

There are some simple steps to follow for connecting the Astro Headset to the Xbox One.
Solution
Here are some quick attachments instructions for the base station to the headset;
- Link the base station to an AC power source.
- Place the headset in the base station, aligning the microphone with the microphone slot (the microphone should be folded in).
- When the headset is being charged, the LED indicator will become orange. Put the headset back into the base station if it isn’t.
- If the charging status is visible on the base station, the connection is complete.
- When all of the battery status lights (4) are on, the headset is fully charged.
Now, connect the Xbox One
- Use the slider on the base station’s back to turn the Xbox mode ON.
- Place the USB cable’s micro end in the base station and its USB end in the Xbox One.
- Place one end of the optical cable in the Xbox’s optical port and the other in the Opt-In the port of the base station.
This way you can enjoy your headset with a gaming console like Xbox One.
Astro A40 + Mixamp M80 Setup With Xbox One
For this what you need is to have an Xbox controller, an Astro A40 Headset, a micro USB Cable, and a Mixamp M80.
- Before doing a setup, update your Xbox One Controller. For this manual update, plug the controller into Xbox One without a Mixamp attached to the circuit.
- Go to Settings > system > update Controller. The update is completed.
- Then, attach the M80 Mixamp to the Controller.
- Connect the other end of the Mixamp to the headset.
You’re all set to experience M80 with Astro A40 headsets on your Xbox One.
Astro A440 Setup On PlayStation5
There are some steps to follow to solve this;

Solution
- Plug the headphones into the base station.
- Switch to PS mode on the base station. This can be accomplished using the back slider.
- Utilize the micro USB connector and optical cable that are both included to connect the base station to the PS5
- Set up the PS5’s audio.
- Configure the PS5’s audio device;
- Go to the PS5’s settings. Select Audio Devices under Devices. Switch to a USB headset for both the input and output devices. Change the Chat Audio setting under Output to Headphones.
This way you will have no issues setting up your headset with the PlayStation.
Wrapping up
This article provides you with an amazing opportunity to discover all the hidden features of your headset by linking it with different kinds of devices. We know it’s a tricky job but we have got you covered, as it is a sure-shot way to get you out with any kind of Astro A40 setup and helps you build enormous confidence to get started.


